Showing posts with label Terrain & scenery. Show all posts

Thursday, May 19, 2022

A thought about terrain

There was a time in which I was of the opinion that wargames were cool mainly because of the rules and you could fully enjoy them playing with unpainted minis, boxes as terrain and grandma's tablecloth as gaming mat. In this regards I have changed my mind quite a bit and in this post I am going to share my views with you.   

my take on Games Workshop "Azyrite Plaza" kit 

Tuesday, October 19, 2021

Painting walls and fences: back to basics

 "Sticks and stones may break my bones (but also protect my home, if properly assembled)".

It’s been a while since I’ve uploaded something; even more since I've painted some sceneries. Family and work have absorbed me a lot in the last two years. However, I have recently managed to carve out some time on Friday nights to get back to painting and modelling. 

As an athlete who has been away from sport for a long time, I decided to start again with something simple. These walls and fences were lying forgotten in a box and I decided to give them a well deserved dignity.

I came up to this result after a couple of relaxing hours. They're now ready to provide decent cover during battles (or, in the worst case, to be forgotten again, but with a good looking paintjob on them).


Monday, December 7, 2020

Playing Infinity N4: the hobby side

Some time ago I ordered a couple of miniature boxes to expand my Aleph army.
Cleaned 'em, glued 'em, primed 'em and, eventually, painted the first box.

The ring around the Sophotect is a Mother-Forge that I didn't glue to the base, choosing to make it removable.
The front gap is wide enough for the miniature to slide through it after a careful 90° rotation.

Since my brother kindly assembled and primed for me the starter box, it was a long time since I assembled some miniatures and I was happy to discover this process to be far more satisfying and rewarding than I remembered

I guess an adult life and a general lack of dedicated space force you to partialize workflow. You can't afford to start something you won't be able to finish or put on hold in the same session, so you learn to recognize and appreciate each milestone, regardless of its importance. This approach to hobbying eluded me when I was a kid so I'm really glad to have experienced it now.

The OSS taking hold of a Kaldstorm settlement.
I'm very pleased with this Scenery Pack: its 4 buildings are definitely worth every cent.
Unfortunately, the game mat is not on the same level: despite the beautiful and detailed print, it shows too much its folding lines.

Monday, April 18, 2016

Fantasy half timbered house - Part 2

Ciao a tutti! 
Eccomi con la seconda parte del w.i.p. dedicata alla pittura della casetta a graticcio.
Per ora ho soltanto steso i primi colori, seguiti da una veloce lavatura marrone sull'intonaco.
Seguiranno ulteriori lavature (verdi e marroni) per invecchiare ulteriormente l'edificio.
A presto.

Hi all!
Here the second part of this w.i.p. dedicated to the painting of the timbered house.
These are just the first layers of colour, with a quick brown wash on the walls.
The next steps will be different washes (green and brown) in order to add some waethering effect.
Stay tuned!


Sunday, March 27, 2016

Fantasy half timbered house - Part 1

This is the new piece of terrain I'm working on for our Mordheim table: a small half timbered house.
Since some of you may be interested in its w.i.p., here some pics of the modeling process.
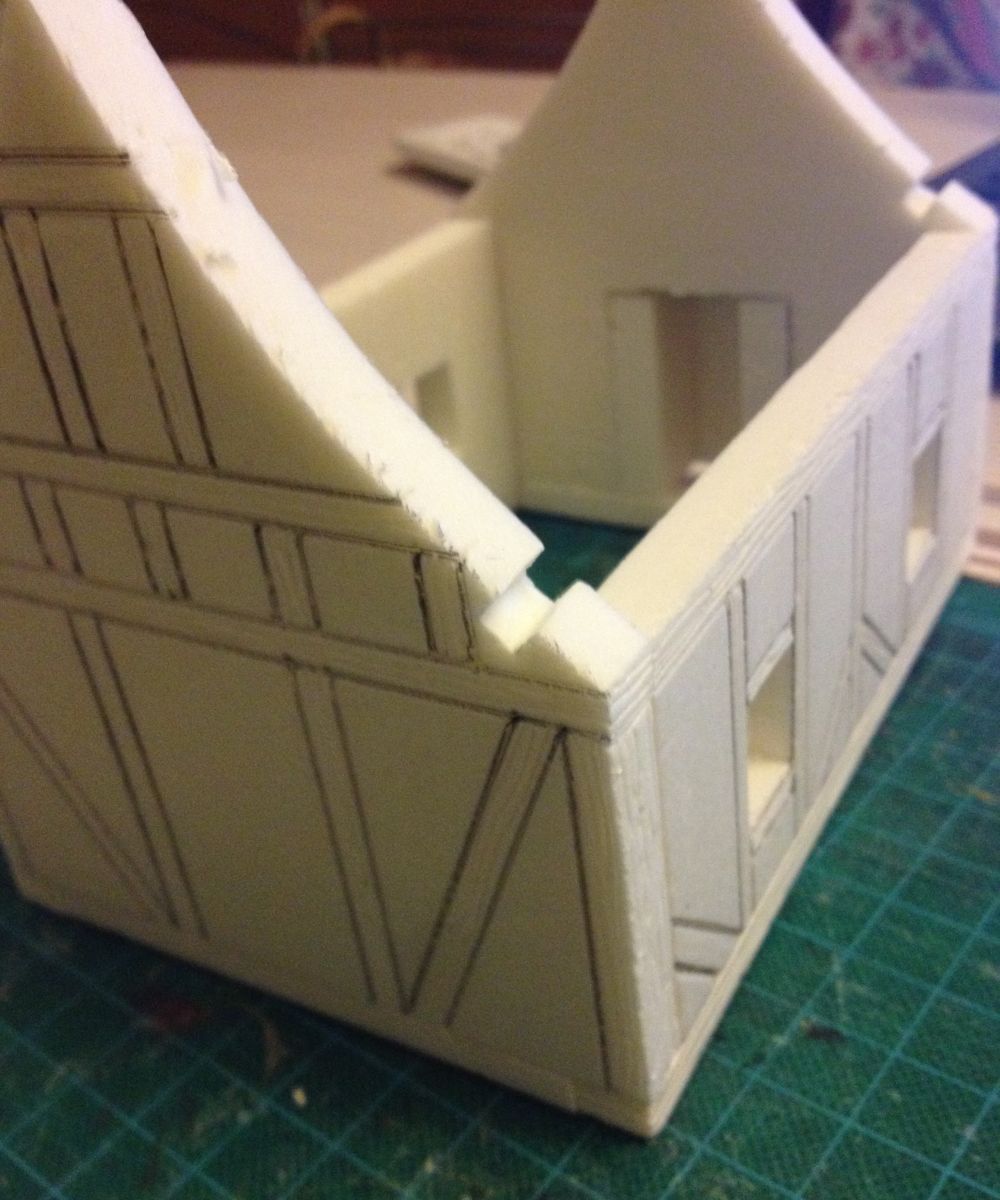
I started from a simple foam panel, 1 cm thick. After drawing the shape of the walls and the facade of the house, I cut along the edges and then carved the wood veins.

Eccovi il mio nuovo scenico al quale sto lavorando per il nostro tavolo di Mordheim: una casetta a graticcio.
Siccome alcuni di voi potrebbero essere interessati al progetto, pubblico alcune immagini dei progressi e delle tecniche utilizzate.
Ho iniziato da un semplice pannello di polistirene spesso 1 cm. Ho tracciato le sagome dei muri e della facciata, ho tagliato i vari pezzi e successivamente ho inciso le venature del legno.


Here you can see the stone walls; the texture was made by pushing a stone on the bricks. Then I pressed some of them back with a modeling tool. The result is quite impressive.

Di seguito le immagine del muro in pietra alla base del piano con il graticcio. 
Ho realizzato la superficie dapprima incidendo la sagoma delle varie pietre. Poi ho schiacciato ogni pietra con un sasso affinchè restasse impressa la texture. Infine ho premuto alcune pietre verso l'interno con uno strumento per scolpire.


To create the roof I cut some strips of foam and then carved the shingles on them. Here you can see my first test.

Per realizzare il tetto ho tagliato con un cutter alcune sottili strisce di polistirene, sulle quali ho inciso e sagomato le tegole.


Satisfied with the result I glued the strips on a piece of cardboard to create the first half of the roof.

Soddisfatto del risultato, ho incollato le strisce su un pezzo di cartoncino.


This is the method that I used to create the windows: cardboard, mosquito net and toothpick.

Il metodo che ho usato per realizzare le finestre consiste nell'incollare un piccolo pezzo di zanzariera ad un po' di cartoncino, per poi realizzare gli infissi con uno stuzzicadenti.


Glued the windows in place...

Qui le finestre incollate al loro posto.


At this point I pressed the walls with a spoon-shaped modeling tool, in order to flatten the surface and to make the wooden timber come out.

Il passo successivo è stato premere i muri con un attrezzo per scolpire di forma concava, per appiattire la superficie dell'intonaco e per far emergere le travi di legno.


Now it's time to paint. Here the first brown coat on the first floor, while I painted the stones with a black colour with some drops of dark brown.

Adesso è tempo di cominciare con il colore. Per il primo piano ho usato un colore di fondo marrone, mentre per le pietre della base un colore nero al quale ho aggiunto qualche goccia di marrone scuro.


Next steps: stone grey followed by a dove-grey.

Passo successivo: una passata di grigio pietra, seguita da una di color tortora.


Stay tuned for updates.

A presto con altri aggiornamenti.

Saturday, January 30, 2016

Mordheim Scenery - "Celestial bridge"

Hello everybody!
This is one the last projects that I've completed. It should represent a fantasy bridge that leads to some sort of chapel, below which there's a planetarium (bits are from GW's Celestial hurricanum).
While the bridge it's made out of Hirst Art's block and high density styrene, the river quay it's only carved in styrene.
The stone floor texture was made using "Minitextures", then painted with acrylics.
The water it's a mixture of PVA glue and plaster, painted and then covered with transparent acrylics.
I leave you with some pictures  of the bridge.


Sunday, December 15, 2013

Attraccoporto e Solcavento - Docktower and Windrider

This is my last work. It took me four months, but it worths the effort.
I hope you'll like it.

Il mio ultimo progetto finalmente è terminato.
Spero che vi possa piacere.